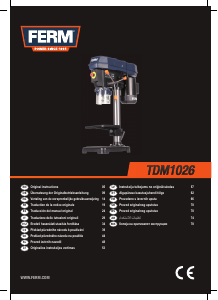
Használati útmutató FERM TDM1006 Állványos fúrógép

Kézikönyvre van szüksége a FERM TDM1006 Állványos fúrógép hez? Az alábbiakban ingyenesen megtekintheti és letöltheti a PDF kézikönyvet angol nyelven. Ehhez a termékhez jelenleg 1 gyakran ismételt kérdés, 0 megjegyzés tartozik, és 0 szavazattal rendelkezik. Ha nem ezt a kézikönyvet szeretné, kérjük, lépjen kapcsolatba velünk.

Hibás a terméke, és a kézikönyv nem kínál megoldást? Látogassa meg a Repair Café szolgáltatást ingyenes javítási szolgáltatásokért.

Használati útmutató

Loading…

Fig.D
If you have shifted the V-belt, you must tighten it again by
means of the engine plate (17) with the fastening button
(18). The tension is correct when the V-belt can be pres-
sed in by approximately 1 cm.
The engine pulley must be aligned horizontally, so that
early wear and loosening of the V-belt can be prevented.
For this purpose the engine pulley on the engine can be
slid along the engine axle, after loosening the socket head
screw.
SPINDLE SPEEDS
Fig.E
Position of V-belt / Revolutions per min.
1) A-4 / 220 5) B-3 / 520 9) D-3 / 1300
2) A-3 / 330 6) C-4 / 560 10) C-1 / 1630
3) B-4 / 350 7) B-1 / 1050 11) D-2 / 1800
4) A-2 / 450 8) C-2 / 1130 12) D-1 / 2500
The number of revolutions of the drill spindle of the V-
belt combinations can be read from the illustration and
the table.
DRILL SPINDLE AND DRILL HEAD PIN
All the blank parts of the machine are provided with a
protective lacquer layer, which prevents rust formation.
This protective lacquer layer is easy to remove by means
of environmentally friendly solvents. Test the V-belt ten-
sion before you connect the machine to the electricity
mains.
The inside of the drill spindle must be degreased comple-
tely. For this purpose use environmentally friendly sol-
vents. Proceed in the same way with the drill head pin. A
correct transmission can only be achieved in this way.
OPERATION, HINTS AND TIPS
DEPTH STOP
Fig.F
The drill spindle is provided with a depth stop. It can be
adjusted using the nut. The drill depth can be read on the
scale division.
CLAMPING THE DRILL
Fig.G
In the drill head of the bench drill, drills and other tools
with a cylindrical shank can be clamped. The moment of
rotation is transferred to the drill by means of the ten-
sion of the three clamping jaws. To prevent the drill from
sliding away, it must be clamped using the toothed ring
wrench. If the drill slides away in the drill holder, a slight
burr occurs on the drill shank, which makes centric clam-
ping impossible. A burr which occurs in this way must in
any case be removed by grinding
CLAMPING THE WORKPIECE
Fig.H
The drill bench and the footplate of the bench drill are
provided with grooves for fastening clamping tools.
Always clamp the workpiece in the machine clamp or
other clamping tools. In this way you will prevent acci-
dents and even increase the drilling accuracy because the
workpiece is in a fixed position.
ADJUSTING THE BENCH
Fig.I
The drill bench is fastened to the drill column and can be
adjusted in height after loosening the fastening handle.
Adjust the bench in such a way that there is still enough
space between the top of the workpiece and the point of
the drill. You can also swivel the bench sideways, if you
wish to clamp a workpiece directly onto the footplate.
Fig.J
For slanted drilling and with a slanted supporting surface
of the workpiece the bench can be swivelled. For this
purpose loosen the hexagonal screw (20) on the hinge
point (21) of the bench and remove the centring. Swivel
the bench (19) to the desired position. Then screw down
the hexagonal screw (20) properly using a wrench.
NUMBER OF REVOLUTIONS, SPEED OF
ROTATION, SUPPLY
The supply - the feed motion of the drill - takes place by
hand on the 3-armed drill lever. The speed of rotation is
determined by the number of revolutions of the drill
spindle and by the diameter of the drill.
The correct choice of supply and the number of revolu-
tions of the drill spindle are the deciding factors for the
lifespan of the drill. The following applies as a basic rule:
with a larger diameter of the drill the number of revolu-
tions must be adjusted lower; the greater the firmness of
the workpiece, the greater the cutting pressure must
also be. In order not to overheat the drill in this case, the
supply and speed of rotation must be lowered at the
same time. In addition, the drill must be cooled with drill
oil.
For thin plates, quite large drillings must be carried out
carefully with little supply and little cutting pressure, so
as to get a precise result and so that the drilling remains
the correct size. For deep drilling (larger than 2 x the dia-
meter of the drill) the discharge of chips is more difficult
and the temperature of the drill is higher. Therefore
lower the supply and the number of revolutions and ens-
ure a better discharge of chips by regularly pulling back
the drill. For drilling with a greater diameter than 8 mm,
pre-drilling must take place, so that early wear of the drill
- main cutting edge can be avoided and so that the drilling
point is not too heavily loaded.
Ferm 552 Ferm
Magyar nyelvű használati útmutató letöltése (PDF, 0.96 MB)
(Gondoljon a környezetre, és csak akkor nyomtassa ki a kézikönyvet, ha feltétlenül szükséges)

Loading…

Értékelés

Ossza meg velünk, mit gondol a FERM TDM1006 Állványos fúrógép: értékelje a terméket. Szeretné megosztani a termékkel kapcsolatos tapasztalatát, vagy kérdése van? Írja megjegyzését az oldal alján lévő szövegdobozba.
Elégedett a FERM TDM1006 Állványos fúrógép-szal?
Igen Nem
Értékelje elsőként a terméket
0 szavazás

Csatlakozzon a termékről folytatott párbeszédhez

Itt megoszthatja véleményét a FERM TDM1006 Állványos fúrógép-ról. Ha kérdése van, először figyelmesen olvassa el a kézikönyvet. Kézikönyv igénylése kapcsolatfelvételi űrlapunk segítségével történhet.

További információ erről a kézikönyvről

Megértjük, hogy jó, ha van egy papíralapú kézikönyv a FERM TDM1006 Állványos fúrógép-hoz. A kézikönyvet bármikor letöltheti weboldalunkról, és saját maga is kinyomtathatja. Ha szeretne egy eredeti kézikönyvet, javasoljuk, hogy lépjen kapcsolatba a következővel: FERM. Esetleg tudnak adni egy eredeti kézikönyvet. Más nyelvű kézikönyvet keres FERM TDM1006 Állványos fúrógép készülékéhez? Válassza ki a kívánt nyelvet a honlapunkon, és keresse meg a modellszámot, hátha elérhető.

Műszaki adatok

Márka FERM
Modell TDM1006
Kategória Állványos fúrógépek
Fájltípus PDF
Fájl méret 0.96 MB

FERM Állványos fúrógépek összes kézikönyve
Állványos fúrógépek további kézikönyvei

Gyakran Ismételt Kérdések a következővel kapcsolatban: FERM TDM1006 Állványos fúrógép

Ügyfélszolgálati csapatunk keresi a hasznos termékinformációkat, és válaszol a gyakran ismételt kérdésekre. Amennyiben pontatlanságot talál a gyakran ismételt kérdésekben, a kapcsolatfelvételi űrlapon jelezze nekünk a hibát.

Tárolhatom az elektromos szerszámokat fészerben vagy garázsban? Ellenőrzött

Általában az elektromos szerszámokat fészerben vagy garázsban tárolhatja, még akkor is, ha ott néha megfagy. Az elektromos kéziszerszám élettartama érdekében azonban jobb, ha száraz helyen tárolja, nagyobb hőmérséklet-ingadozások nélkül. Egy fészerben vagy garázsban a hőmérséklet-különbségek páralecsapódást okozhatnak, ami rozsdát okozhat. Ráadásul az akkumulátorral működő szerszámok rövidebb élettartamúak, és nem töltődnek olyan jól nagyon alacsony hőmérsékleten. Az elektromos kéziszerszám tárolásának módjában mindig alaposan olvassa el a használati útmutatót.

Hasznos volt (7) Olvass tovább
Használati útmutató FERM TDM1006 Állványos fúrógép

Kapcsolódó termékek

Kapcsolódó kategóriák