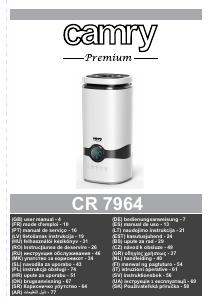
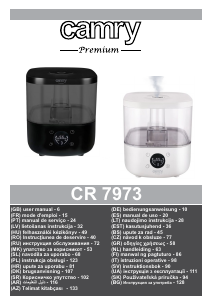
Használati útmutató Camry CR 7952 Párásító

Kézikönyvre van szüksége a Camry CR 7952 Párásító hez? Az alábbiakban ingyenesen megtekintheti és letöltheti a PDF kézikönyvet angol nyelven. Ez a termék jelenleg 2 gyakran ismételt kérdéseket, 0 megjegyzést tartalmaz, és 1 szavazattal rendelkezik, a termék átlagos értékelése 100/100. Ha nem ezt a kézikönyvet szeretné, kérjük, lépjen kapcsolatba velünk.

Hibás a terméke, és a kézikönyv nem kínál megoldást? Látogassa meg a Repair Café szolgáltatást ingyenes javítási szolgáltatásokért.

Használati útmutató

Loading…

dangerous temperature rise and can damage the device. Always connect the power
adaptor cable to the device, and then connect the power adaptor to the power socket.
22. Never turn on a humidifier if it is not filled with water.
23. Use only clean, cold distilled water.
24. Do not add drugs or chemical substances to the tank, base or vapor outlet. Do not add
aromatic oils, salt, decalcifying tablets, powders or cleaning agents to water.
25. Water tank cap should always be tightly screwed.
26. Make sure that the water mist outlet is not aimed directly at the walls, furniture,
electrical outlets, electrical and electronic equipment and children.
27. Do not block the device ventilation. Keep at least 20 cm free space around the device.
Do not block the water mist outlet.
28. Do no use the device if there is risk of developing condensation. Moisture may occur on
the external or internal device parts if:
– the device is moved from a cold to a warm place,
– the heating system has just been turned on,
– the device is being used in a high moisture area,
– the device is cooled by the air conditioning cooling system.
If the unit may not operate properly if it develops moisture condensation; in extreme cases
it can become damaged. In such case, do not use the device and leave it to dry for a few
hours.
29. Do not tilt or overturn the device and do not attempt to add or drain water when the
device is operating.
30. Do not remove the tank from the device base during the device operation.
31. Do not touch the device with wet hands.
32. The filled tank is heavy. When moving it, support it also from the bottom.
33. Do not use the humidifier when you see the water leak at the bottom.
34. Do not leave water in the humidifier it is not in use.
35. Clean the humidifier after each use. Follow the cleaning recommendations in this
instruction.
36. Never let the tank in the humidifier base develop sediment, moisture or gather water (it
could contaminate or even damage the ultrasonic nebulizer).
37. When the device is operating for a long time, the water mist emitted by the humidifier
can settle on the floor and make it wet.
38. Too much humidity in the room can lead to moisture accumulation causing the growth of
bacteria and fungi and damage to walls, furniture and wallpaper.
39. Do not lift the water tank with the water mist outlet.
40. Do not submerge the base of the humidifier.
DESCRIPTION OF THE DEVICE (fig A)
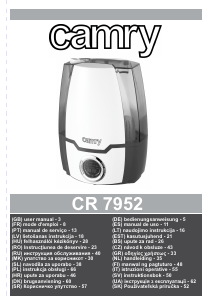
1. Water mist outlet 2. Water tank
3. Base 4. Control panel
CONTROL PANEL (diagram B)
1. ON/OFF button 2. RESET button
3. MIST button 4. Humidity icon
5. ANION button 6. HUMIDISTAT button
7. TIMER button 8. “Waterless” icon
9. Ionization icon 10. Humidity and time indicator
11. Humidity level Indicator
USING THE DEVICE
1. Make sure that the humidifier is unplugged. Add water to the tank (A2) only when the device is not connected to power.
2. Remove the water tank (A2), unscrew the water filler and will the tank with cold distilled water.
3. Wipe the tank with dry cloth until its dry and put it on the base.
4. Connect the device to power. The display panel (A4) will light up for two seconds, then it will go out. The humidifier will wait for the
setting mode.
Delayed start: Allows for setting off the start time in a certain number of hours. Press the PRESET button (B2) to set the number
of hours. Each time you press the button (B2) the hour increases by one. The maximum start delay is 24 hours. The “0” setting
cancels the delayed start.
Continuous operation: Start the humidifier by pressing the ON/OFF (B1) button. The humidity icon (B4) will light up showing the
current humidity level (B10) in the room. To change the humidity level press the MIST button (B3). Adjusting the humidity level is
a 4-step operation; each pressing of the button (B3) changes the humidity by 1 degree. The humidity level is shown on the
humidity level indicator (B11).
Delayed stop: to program turning off the device after a certain time, press the TIMER (B7) button when the device is on. Each
4
Magyar nyelvű használati útmutató letöltése (PDF, 3.19 MB)
(Gondoljon a környezetre, és csak akkor nyomtassa ki a kézikönyvet, ha feltétlenül szükséges)

Loading…

Értékelés

Ossza meg velünk, mit gondol a Camry CR 7952 Párásító: értékelje a terméket. Szeretné megosztani a termékkel kapcsolatos tapasztalatát, vagy kérdése van? Írja megjegyzését az oldal alján lévő szövegdobozba.
Elégedett a Camry CR 7952 Párásító-szal?
Igen Nem
100%
0%
1 szavazás

Csatlakozzon a termékről folytatott párbeszédhez

Itt megoszthatja véleményét a Camry CR 7952 Párásító-ról. Ha kérdése van, először figyelmesen olvassa el a kézikönyvet. Kézikönyv igénylése kapcsolatfelvételi űrlapunk segítségével történhet.

További információ erről a kézikönyvről

Megértjük, hogy jó, ha van egy papíralapú kézikönyv a Camry CR 7952 Párásító-hoz. A kézikönyvet bármikor letöltheti weboldalunkról, és saját maga is kinyomtathatja. Ha szeretne egy eredeti kézikönyvet, javasoljuk, hogy lépjen kapcsolatba a következővel: Camry. Esetleg tudnak adni egy eredeti kézikönyvet. Más nyelvű kézikönyvet keres Camry CR 7952 Párásító készülékéhez? Válassza ki a kívánt nyelvet a honlapunkon, és keresse meg a modellszámot, hátha elérhető.

Műszaki adatok

Márka Camry
Modell CR 7952
Kategória Párásítók
Fájltípus PDF
Fájl méret 3.19 MB

Camry Párásítók összes kézikönyve
Párásítók további kézikönyvei

Gyakran Ismételt Kérdések a következővel kapcsolatban: Camry CR 7952 Párásító

Ügyfélszolgálati csapatunk keresi a hasznos termékinformációkat, és válaszol a gyakran ismételt kérdésekre. Amennyiben pontatlanságot talál a gyakran ismételt kérdésekben, a kapcsolatfelvételi űrlapon jelezze nekünk a hibát.

Milyen páratartalom mellett érdemes párásítót használni? Ellenőrzött

Ha a beltéri páratartalom 50% vagy annál alacsonyabb, párásító hasznos lehet.

Hasznos volt (297) Olvass tovább

Mekkora az ideális páratartalom egy lakótér számára? Ellenőrzött

Az ideális páratartalom egy házban 40-60% között van. Magasabb vagy alacsonyabb páratartalom esetén a gombák, baktériumok és vírusok nagyobb valószínűséggel fejlődnek ki, és személyes kényelmetlenséget tapasztalhat.

Hasznos volt (147) Olvass tovább
Használati útmutató Camry CR 7952 Párásító

Kapcsolódó termékek

Kapcsolódó kategóriák