
54
UK
IMPORTANT SAFETY INFORMATION
READ CAREFULLY AND KEEP FOR FUTURE
REFERENCE
This appliance can be used by children
aged from 8 years and above and persons
with reduced physical, sensory or mental
capabilities or lack of experience and
knowledge if they have been given
supervision or instruction concerning use of
the appliance in a safe way and understand
the hazards involved. Children shall not
play with the appliance. Cleaning and user
maintenance shall not be made by children
unless they are older than 8 and supervised.
Keep the appliance and its cord out of reach
of children less than 8 years.
Bread can burn therefore do not use the
appliance near or below combustible
materials such as curtains. Never use the
appliance below wall cupboards or shelves.
Never operate the appliance by means of an
external timer or separate remote-control
system.
Do not touch the metal parts of the
appliance during use as they may become
very hot.
If the supply cord is damaged, it must be
replaced by the manufacturer, its service
agent or similarly qualied persons in order
to avoid a hazard.
• Never use this appliance for anything other than its intended use.
This appliance is for household use only. Do not use this appliance
outdoors.
• Always ensure that hands are dry before handling the plug or
switching on the appliance.
• Always use the appliance on a stable, secure, dry and level surface.
• This appliance must not be placed on or near any potentially hot
surfaces (such as a gas or electric hob).
• Do not use the appliance if it has been dropped or if there are any
visible signs of damage.
• Ensure the appliance is switched off and unplugged from the supply
socket after use and before cleaning.
• Always allow the appliance to cool before cleaning or storing.
• Never immerse any part of the appliance or power cord and plug in
water or any other liquid.
• Never let the power cord hang over the edge of a work top, touch hot
surfaces or become knotted, trapped or pinched.
• Never leave the appliance unattended when in use.
• Before connecting to a power source, make sure your mains supply
voltage is the same as the one indicated on the appliance.
• Never force bread into the toasting slots.
• Never toast slices of bread that have been buttered.
• Never use your toaster with any food item that contains sugar, or any
product that contains jam or preserves.
• Don’t use bent, damaged or broken bread in your toaster.
FITTING OF A PLUG - FOR U.K. AND IRELAND ONLY
This appliance must be earthed.
If the plug is not suitable for the socket outlets in your home, it can be
removed and replaced by a plug of the correct type.
If the fuse in a moulded plug needs to be changed, the fuse cover must
be retted. The appliance must not be used without the fuse cover tted.
If the plug is unsuitable, it should be dismantled and removed from the
supply cord and an appropriate plug tted as detailed. If you remove the
plug it must not be connected to a 13 amp socket and the plug must be
disposed of immediately.
If the terminals in the plug are not marked or if you are unsure about the
installation of the plug please contact a qualied electrician.
BEFORE FIRST USE
Carefully remove your toaster from its box. Remove all packaging from
inside the toasting slots.
Position your toaster on a stable, secure, dry and level work surface
away from the edge.
Connect the plug to a suitable power outlet and make sure that the
power cord does not overhang the work surface.
When you rst use your toaster, there may be a slight odour as the
heating elements warm up for the rst time. This is normal and not a
cause for concern. To remove the odour, simply operate your toaster for
the rst time without any bread in it.
CONTROLS
Browning control
The browning control regulates how much the bread is toasted—in
other words, the colour of the toast. Lower settings produce lighter toast
and higher settings produce darker toast.
When setting the browning control, remember that dry or thin slices of
bread will toast quicker and require a lower setting. Moist or thick slices
of bread will require a higher setting.
Cancel button
The toasting process can be stopped at any time by pressing the cancel
button.
Lift-and-look feature
The lift-and-look feature allows you to check the progress of the toast
without cancelling the toasting process. Just lift the loading handle up
at any time during toasting and lower it again to resume toasting. If you
nd your toast is cooked to your preference, press the cancel button to
stop further toasting (gure 1).
High lift feature
The high lift feature uses the loading handle to help you to remove the
toast. When toasting has nished, simply lift the loading handle upwards
from its rest position to raise the toast and make it easier to remove
(gure 2).
Frozen bread function
The frozen bread function allows you to toast bread straight from the
freezer. Insert the bread into your toaster, press the loading handle
down and then press the frozen bread button. Your toaster will extend
the toasting time to allow the bread time to defrost. Watch the toast to
ensure that it doesn’t burn.
Reheat function
The reheat function will heat up toast that has cooled or gone cold.
Press the loading handle down then press the reheat button. Watch the
toast to ensure that it doesn’t burn. Don’t use the reheat function on
buttered toast.
USING YOUR TOASTER
1. Set the level of toasting using the browning control. The higher the
number selected, the darker the toast will be.
2. Place the bread into the toasting slots. Press the loading handle
down until it latches. The bread will be lowered into the toaster and
toasting will begin.The loading handle will not latch if your toaster
is not connected to the mains supply.
3. When toasting has nished, the loading handle will rise and the
toasted bread can be removed. You can lift the loading handle
upwards beyond its rest position to help you remove the toast
(gure 2).
4. If the toast is not done enough it can be toasted again. Turn the
browning control to a lower setting and watch the toast to ensure
that it doesn’t burn.
5. Toasting can be stopped at any time by pressing the cancel
button.
If you are toasting a single slice of bread, set the browning control to
a lower setting than normal. By using a lower setting when toasting a
single slice of bread, it will not be over toasted.
IF YOUR TOASTER JAMS
Never use a knife or any other utensil or implement to remove jammed
bread. Never insert your ngers into the bread slots.
1. Unplug the toaster from the mains supply socket.
2. Allow the toaster to completely cool down.
3. Carefully ease the bread out of the toaster being careful not to
damage the heating element.
CLEANING
Clean the outside of your toaster with a damp cloth then dry thoroughly.
Never use harsh, abrasive or caustic cleaners.
Never immerse the toaster or power cord and plug in water or any other
liquid.
Always switch off, unplug and allow to cool before moving, vleaning or
storing.
CRUMB REMOVAL
It is important that crumbs are not allowed to build up inside your
toaster. Excess crumbs are unhygienic and could catch re.
Crumbs can be removed by sliding the crumb tray out from the bottom
of your toaster (gure 3). You can then tip the crumbs out. Always make
sure that your toaster has completely cooled down and is disconnected
from the mains supply before removing crumbs. Never use your toaster
without the crumb tray tted—always replace the crumb tray before
using your toaster.
USING THE WARMING RACK
Use the warming rack to warm up bagels, croissant, etc.
1. Make sure that the loading handle is not in the latched (down)
position and t the warming rack (gure 4).
2. Place the bagel, croissant, etc. onto the rack.
3. Set the browning control to 1 and press the loading handle down.
Never set the browning control higher than 1. If the item isn’t
warmed enough, turn it over and repeat. Watch the item to ensure
that it doesn’t burn.
WARNING The rack will become HOT during use—use caution when
tting or removing the rack after use. Alternatively, allow it to fully cool
down before removal. ALWAYS remove the rack when making toast.
Blue
(Neutral)
Brown
(Live)
13A Fuse
Green/Yellow
(Earth)
Plug should be ASTA approved to BS1363
Fuse should be ASTA approved to BS1362
Ensure that the outer sheath of
the cable is firmly held by the cord grip
PARTS
1. Warming rack
2. Bread slots
3. Loading handle with high lift feature and lift-and-look feature
4. Browning control
5. Cancel button
6. Frozen bread button
7. Reheat button
8. Crumb tray

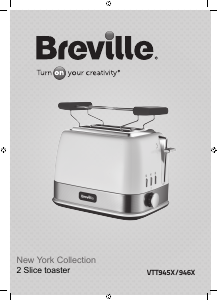


Csatlakozzon a termékről folytatott párbeszédhez
Itt megoszthatja véleményét a Breville VTT945X New York Kenyérpirító-ról. Ha kérdése van, először figyelmesen olvassa el a kézikönyvet. Kézikönyv igénylése kapcsolatfelvételi űrlapunk segítségével történhet.