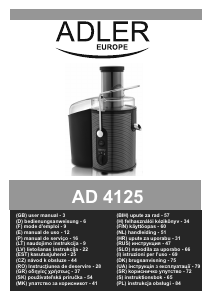
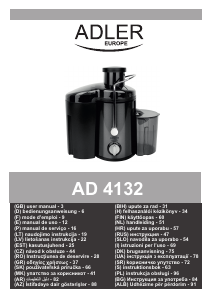
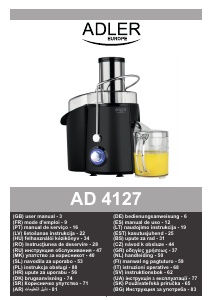
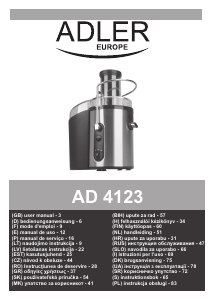
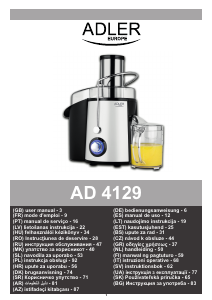
Használati útmutató Adler AD 4129 Gyümölcscentrifuga

Kézikönyvre van szüksége a Adler AD 4129 Gyümölcscentrifuga hez? Az alábbiakban ingyenesen megtekintheti és letöltheti a PDF kézikönyvet angol nyelven. Ez a termék jelenleg 2 gyakran ismételt kérdéseket, 0 megjegyzést tartalmaz, és 0 szavazattal rendelkezik. Ha nem ezt a kézikönyvet szeretné, kérjük, lépjen kapcsolatba velünk.

Hibás a terméke, és a kézikönyv nem kínál megoldást? Látogassa meg a Repair Café szolgáltatást ingyenes javítási szolgáltatásokért.

Használati útmutató

Loading…

5
ASSEMBLING THE DEVICE
- Make sure that the sieve sits properly on its base, so that the gear on the bottom of the sieve bowl engages the gear in the base.
3. Close the safety locking handle (11).
USE
2. Install the stainless steel grater and filter sieve (9) and then put the cover on (8).
1. Place the juice and pulp separating bowl (10) on the base (6).
- Be careful not to touch the sharp teeth on the bottom of the sieve.
- Make sure that the grater and filter sieve are not too loose on the base and that they rotate evenly.
4. Insert the large pulp container (3) correctly, place the juice jug on the opposite side of the juicer. NOTE: Before turning the device on,
make sure that all parts are properly installed.
1. Place the juicer on a smooth, flat and stable surface.
2. Try to assemble and disassemble the unit for a few times before start working with the units.
6. Always treat the filter (9) with care as it can be easily damaged.
7. Discoloration of the plastic may occur with strongly colored fruit and vegetables. To help prevent this, wash parts immediately after
use.
5. Do not soak the stainless steel grater and filter sieve (9) in bleach.
3. Make sure the juicer is assembled correctly.
- Make sure the juice jug is placed under the spout (7).
NOTE: The machine is fitted with a safety switch (12). It prevents the juicer from being started unintentionally.
- Make sure that the stainless steel filter (9) has been thoroughly washed.
4. Put the plug into the power socket and turn on the device by setting the switch to the '1' or '2' position. Depending on the fruit or
vegetables used, use the speed switch (5) to change the speed to low (switch in '1' position) or high (switch in '2' position).
3. Remove the juice and pulp separating bowl (10), then pull the stainless steel grater and filter basket (9) upwards.
CLEANING AND MAINTENANCE
2. Wash the fruit or vegetables you want to use. In case they do not fit in the feeder (2), cut them into smaller pieces.
2. After disassembling the unit all removable parts may be washed in hot soapy water.
2. Remove the cover (8).
8. If discoloration does occur, the plastic parts can be soaked in 10% lemon juice and water or they can be cleaned with a non-abrasive
cleaner. To assist with cleaning soak the stainless steel grater and filter sieve (9) in hot soapy water for approximately 10 minutes
immediately after juicing is completed. If pulp is left to dry on the filter it may clog the fine pores of the filter mesh thereby lessening the
effectiveness of the juicer.
6. Juice will start to drain into the jug and the pulp will start to collect in the container on the other side. To empty the pulp container (3),
switch off the juicer. Do not empty the container when the device is running and be careful not to overfill it, it may damage the device.
9. Do not use abrasive pads or aggressive agents for cleaning.
NOTE: Never immerse the motor part in water or rinse under the tap.
5. With the engine running, place the fruit (or vegetables) in the feeder (2). Use the pusher (1) to push them down. To get as much juice
as possible, push the fruit slowly.
DISASSEMBLY OF THE DEVICE
1. Turn the 3 position switch (5) to the '0' position. Unplug the power cord of the juicer from the power socket. Release the safety handle
(11).
1. For easy cleaning - immediately after each use rinse removable parts under running water (to remove wet pulp). Allow parts to dry.
3. The cover (8) with the feeder (2), juice and pulp separating bowl (10), pulp container (3) and juice jar are dishwasher safe.
4. Wipe the motor base (6) with a damp cloth.
Maximum operation time: 3min - 20 minutes break
TECHNICAL DATA
Voltage: 220-240V ~ 50/60Hz
Maximum power: 2000W
Two speeds mode: Hi - switch in position '2', Low - switch in position '1'.
Nominal power: 1000W
ingredients may pose a threat to the environment. The electrical device should be handed over to limit
its reuse and use. If in the device there are batteries you have to take out and give to the point stored separately.
Please transfer cardboard packaging to waste paper. Pour the polyethylene bags (PE) into the plastic container
Worn device should be returned to the appropriate point storage because it is dangerous in the device
Magyar nyelvű használati útmutató letöltése (PDF, 4.66 MB)
(Gondoljon a környezetre, és csak akkor nyomtassa ki a kézikönyvet, ha feltétlenül szükséges)

Loading…

Értékelés

Ossza meg velünk, mit gondol a Adler AD 4129 Gyümölcscentrifuga: értékelje a terméket. Szeretné megosztani a termékkel kapcsolatos tapasztalatát, vagy kérdése van? Írja megjegyzését az oldal alján lévő szövegdobozba.
Elégedett a Adler AD 4129 Gyümölcscentrifuga-szal?
Igen Nem
Értékelje elsőként a terméket
0 szavazás

Csatlakozzon a termékről folytatott párbeszédhez

Itt megoszthatja véleményét a Adler AD 4129 Gyümölcscentrifuga-ról. Ha kérdése van, először figyelmesen olvassa el a kézikönyvet. Kézikönyv igénylése kapcsolatfelvételi űrlapunk segítségével történhet.

További információ erről a kézikönyvről

Megértjük, hogy jó, ha van egy papíralapú kézikönyv a Adler AD 4129 Gyümölcscentrifuga-hoz. A kézikönyvet bármikor letöltheti weboldalunkról, és saját maga is kinyomtathatja. Ha szeretne egy eredeti kézikönyvet, javasoljuk, hogy lépjen kapcsolatba a következővel: Adler. Esetleg tudnak adni egy eredeti kézikönyvet. Más nyelvű kézikönyvet keres Adler AD 4129 Gyümölcscentrifuga készülékéhez? Válassza ki a kívánt nyelvet a honlapunkon, és keresse meg a modellszámot, hátha elérhető.

Műszaki adatok

Márka Adler
Modell AD 4129
Kategória Gyümölcscentrifugák
Fájltípus PDF
Fájl méret 4.66 MB

Adler Gyümölcscentrifugák összes kézikönyve
Gyümölcscentrifugák további kézikönyvei

Gyakran Ismételt Kérdések a következővel kapcsolatban: Adler AD 4129 Gyümölcscentrifuga

Ügyfélszolgálati csapatunk keresi a hasznos termékinformációkat, és válaszol a gyakran ismételt kérdésekre. Amennyiben pontatlanságot talál a gyakran ismételt kérdésekben, a kapcsolatfelvételi űrlapon jelezze nekünk a hibát.

Meg kell hámozni a gyümölcsöt, mielőtt beteszem a facsaróba? Ellenőrzött

Nem, általában a hámozatlan gyümölcsöt behelyezheti egy facsaróba. A hámlást a rosttal együtt gyűjtik össze. Célszerű eltávolítani a gyümölcsből az esetleges köveket.

Hasznos volt (153) Olvass tovább

Mi a különbség a facsaró és a citrusprés között? Ellenőrzött

A citrus facsaró a citrusfélék gyümölcsét préseli, amelyet előbb felezni kell, és így a gyümölcs pépet hagy. A facsaró egy egész gyümölcsdarabot megcsavar és egy szitán átnyom, és összegyűjti a pépet, így nagyobb mennyiségű gyümölcslé lesz.

Hasznos volt (128) Olvass tovább
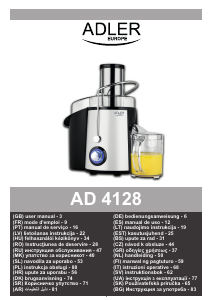
Használati útmutató Adler AD 4129 Gyümölcscentrifuga

Kapcsolódó termékek

Kapcsolódó kategóriák

×
Download